Getting Started tutorial
Author
Thomas Dalla PiazzaThis tutorial presents the basic setup required to start working on plc-playground. As a first step, you will be guided throught the required setup. Then we will present a few steps to test the whole and finally we will present a small program example written in Codesys IDE.
Setup
Plc-playground runs the simulation model in the browser for maximum performance and low communication latency. The main drawback of this system is that for sercurity reasons, all the code is running in a sandbox with limitted access to the network. Basically, only HTTP requests and websockets are allowed. To communicate with PLCs with industrial protocols like ModbusTCP, it is requires to have access to lower levels sockets basically TCP sockets. It is then required to setup a piece of software that will translate the messages from the Websocket to the TCP socket. Such a software is further refered as the socket proxy/bridge.
The simulated systems on plc-playground are setup to communicate with a custom made proxy. The source code of that bridge can be found on github (modbus_ws_adapter).To build and run the modbus_ws_adapter tool, please refer to this guide first.
In this tutorial, we will not use a regular PLC but rather use an emulated one. We will install and use the emulated PLC of Codesys for the purpose of this tutorial but other alternatives exists like open-plc.
Download and install Codesys V3
Visit https://store.codesys.com/en/ and download the version corresponding to your architecture

If you don't currently have a Codesys store account, you will be invited to create a new one. After download, run the installer by clicking on "install".
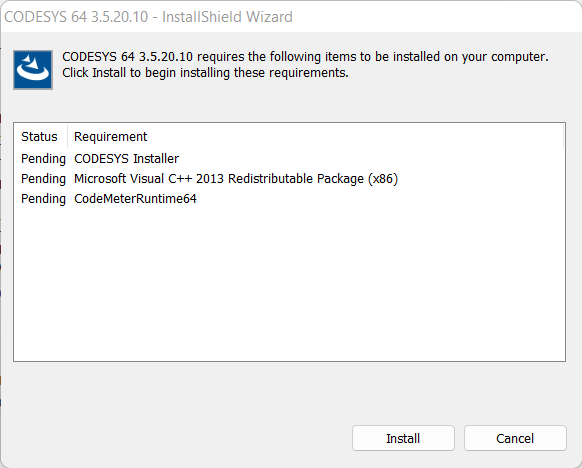
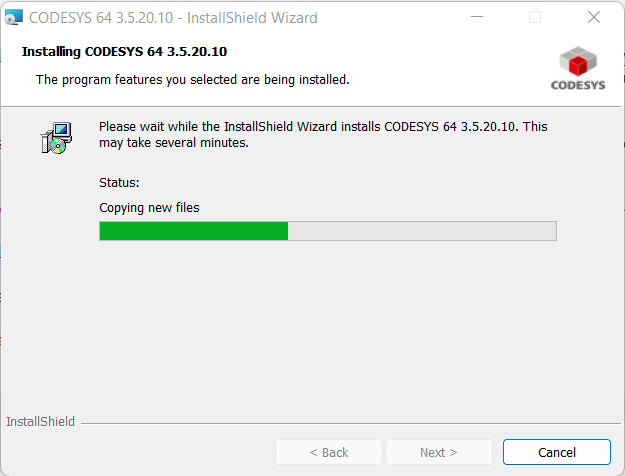
Once the installer is run, select "complete installation" and install.
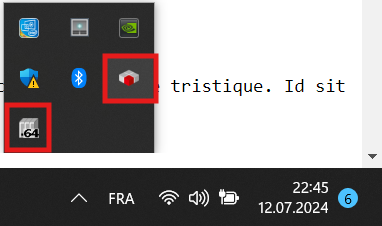
After the installation, you notice several changes in your system tray. The first is the CODESYS Gateway used to communicate between the IDE and the PLCs (hardware or emulated), the second is the CODESYS Control Win.V3 which is the emulated PLC shipped with codesys V3.
Creating a project
We will now go through the setup of a Codesys project by configuring the emulated PLC to communicate in Modbus TCP with the simulation model.
Start Codesys and from the file menu, select "New Project".
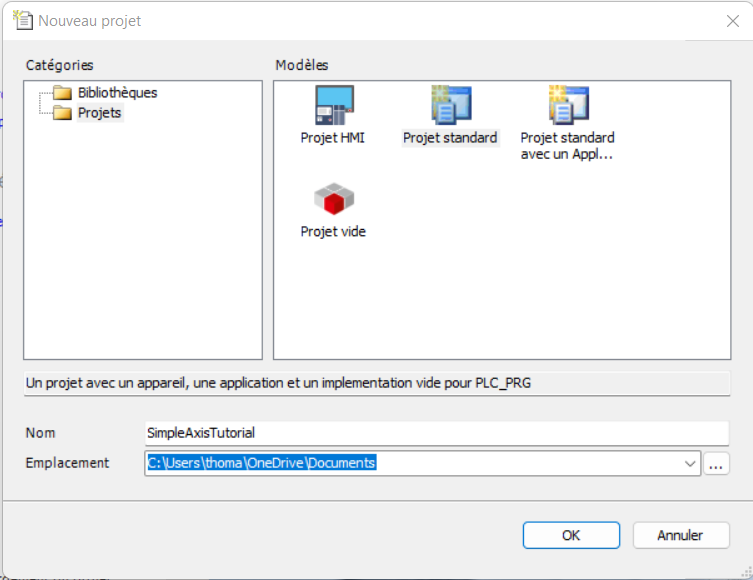
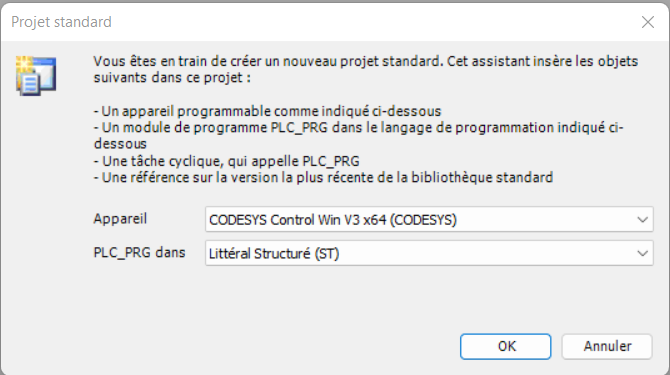
Select Standard Project as a template and give a name to the project file. Click OK.
As device, select the emulated PLC "Codesys Control Win V3 x74 (CODESYS)" and for the purpose of this tutorial, we will choose "Structured Text" as a language. Click OK.
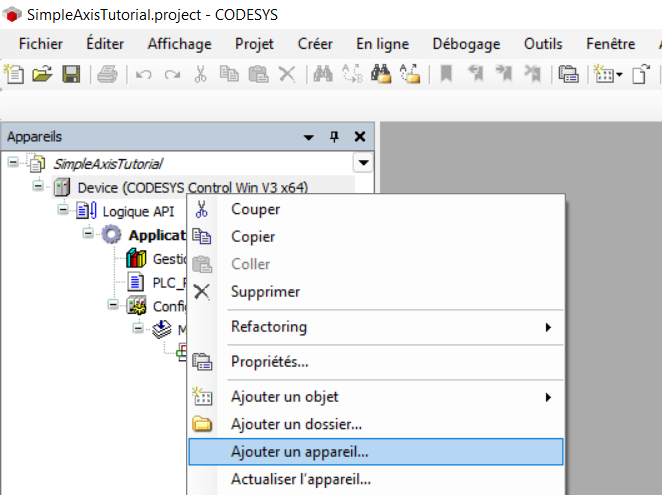
Now we will need to attach to our device a Network adapter, a Modbus TCP Master node and finally our Modbus TCP Slave node. Right click on the device in the device tree pannel and select "Add Device". The "Add Device" window appears.
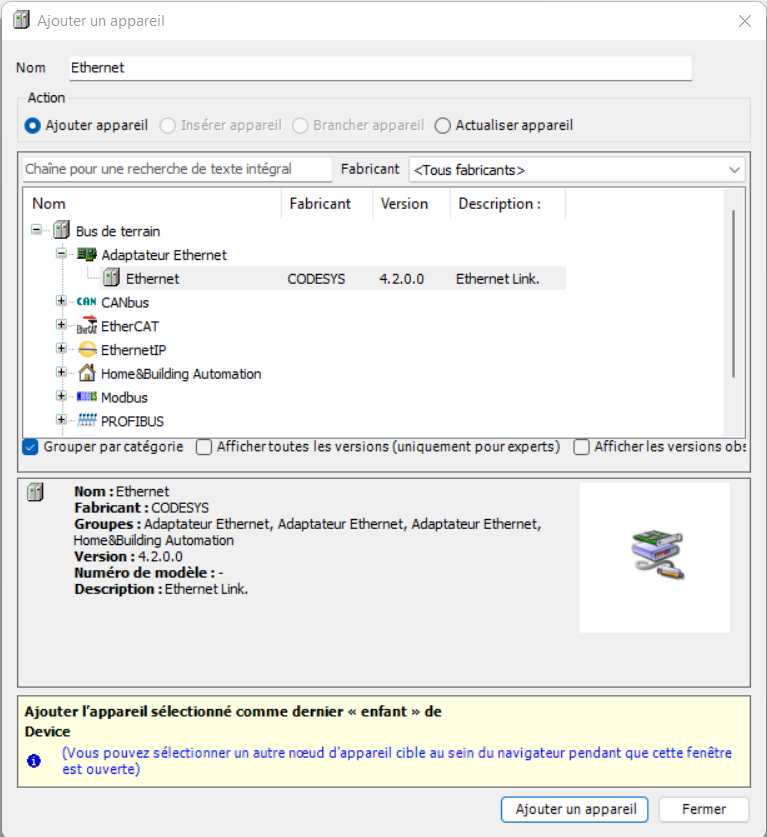
Under "Ethernet Adapter" select "Ethernet" and click "Add Device".
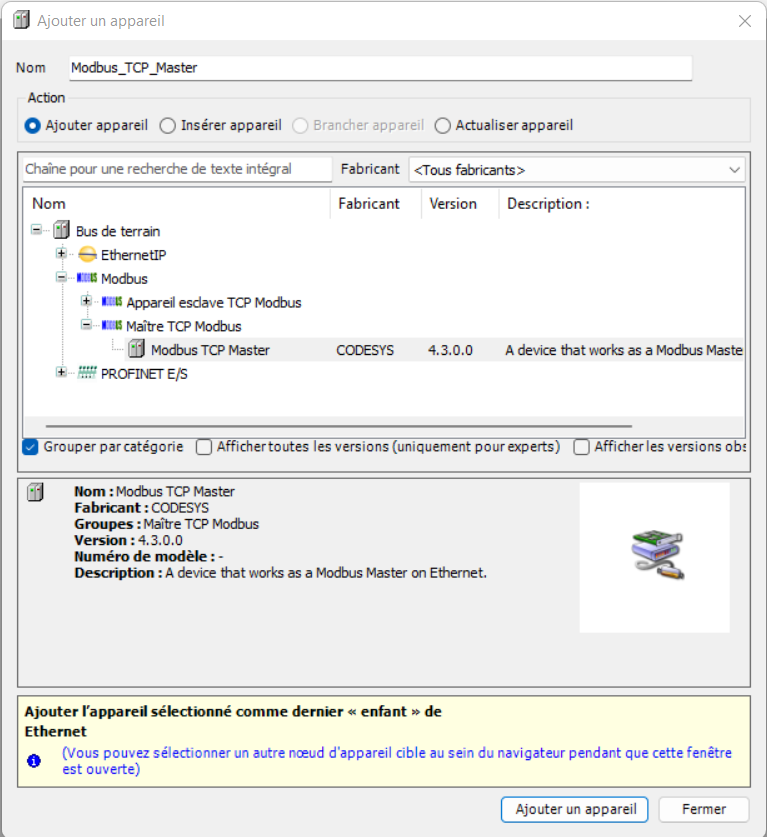
This add the ethernet adapter to our emulated device. Select the adapter in the device tree and add a Modbus TCP Master device.
Finally, select the Modbus master device in the device tree and add a Modbus TCP Slave device.
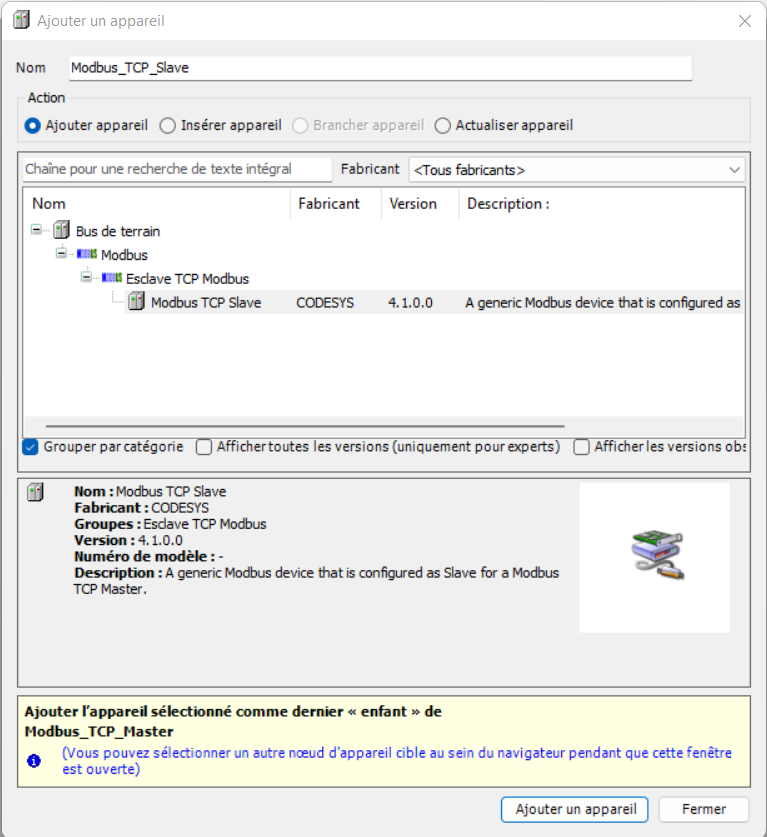
You can now close the Add Device window and we will configure that slave to retriev the data from the slave node hosted by the simulated model running in the browser.
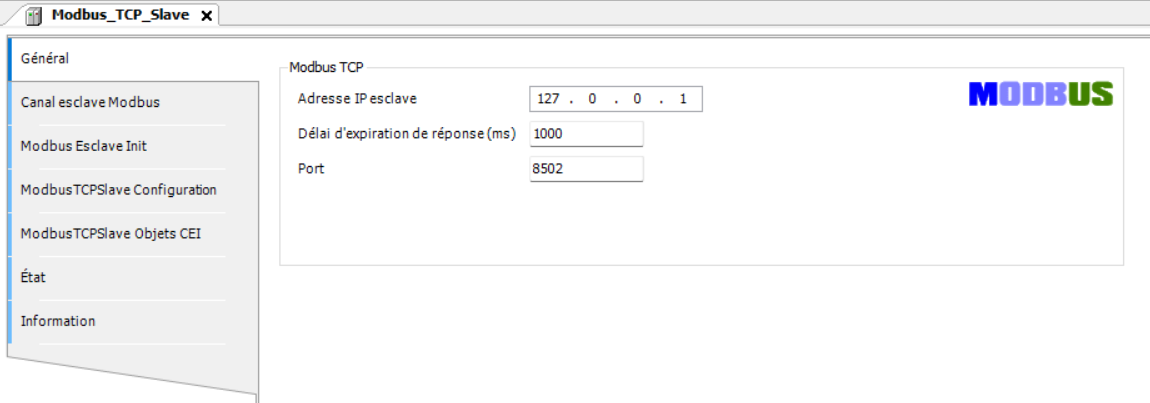
Double-click the Modbus TCP Slave device and configure the "General" tab as in the picture below.
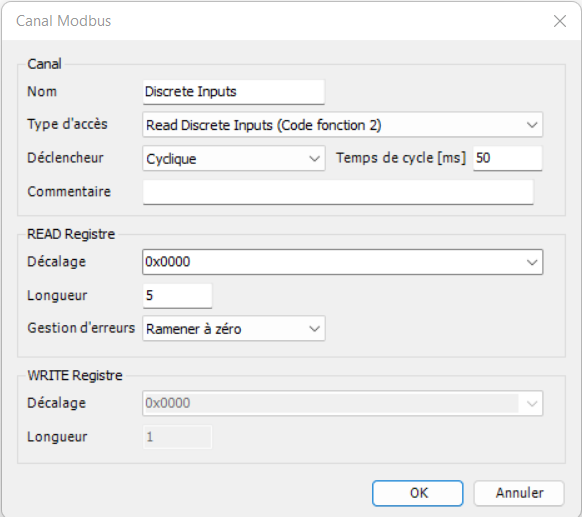
Move to the Modbus Slave Channel tab and click "Add Channel". Configure a new channel to read the discrete inputs every 50ms as shown in the next figure.
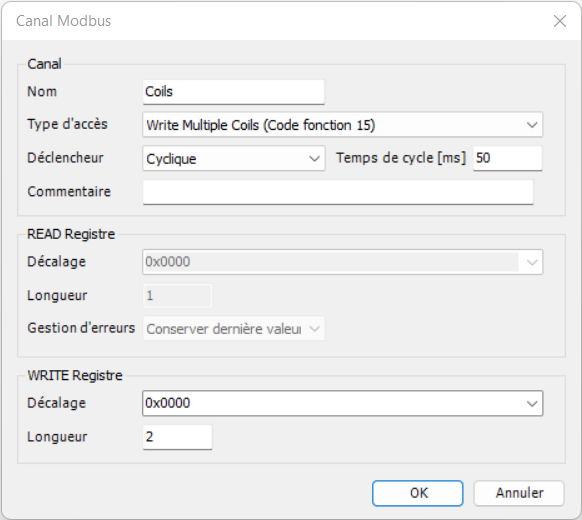
Click OK and add a new channel to write coils. The configuration of that new channel is shown in the next figure.
The setup of the project is done and we do have an emulated PLC with the modbus TCP slave configured to communicate with the Simple Axis simulated model. In the next section, we will write a simple program just for testing.
Creating a simple program
Our program will simply move the axis left and right according to the buttons pressed on the model page. So we will read the discrete inputs corresponding to the buttons and write the coils to move the axis accordingly. We will define four boolean variables to host the inputs (buttons) and the commands (move left and right) and write the program with simple IF statments. Your program tab should look as bellow.
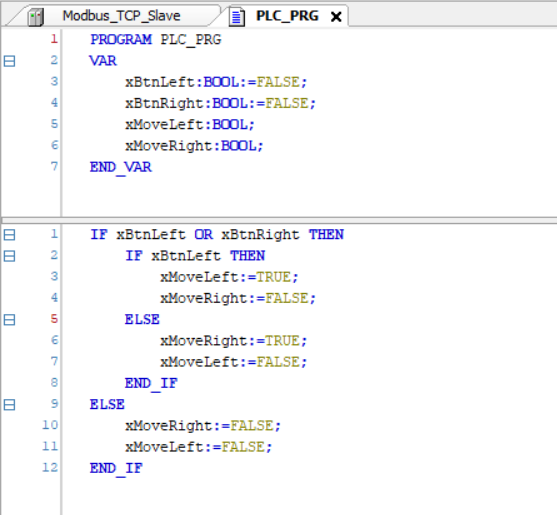
The last thing we need to do is to map the modbus channels data to our variables. According to the Simple Axis model description, we know that the button "Move Left" is mapped at address 0x03 of the discrete inputs. The button "Move Right is mapped at address 0x04. The command to move the axis right is the coil with address 0x00 and to move to the left the address is 0x01. In the Modbus TCP Slave Device, locate the "ModbusTCPSlave I/O Mapping tab.
Select the row with address of bit 3 of the Discrete Inputs channel and click in the "Variable" cell. Then click on the three dots to open the variable locator.

Locate your program variable and click OK.
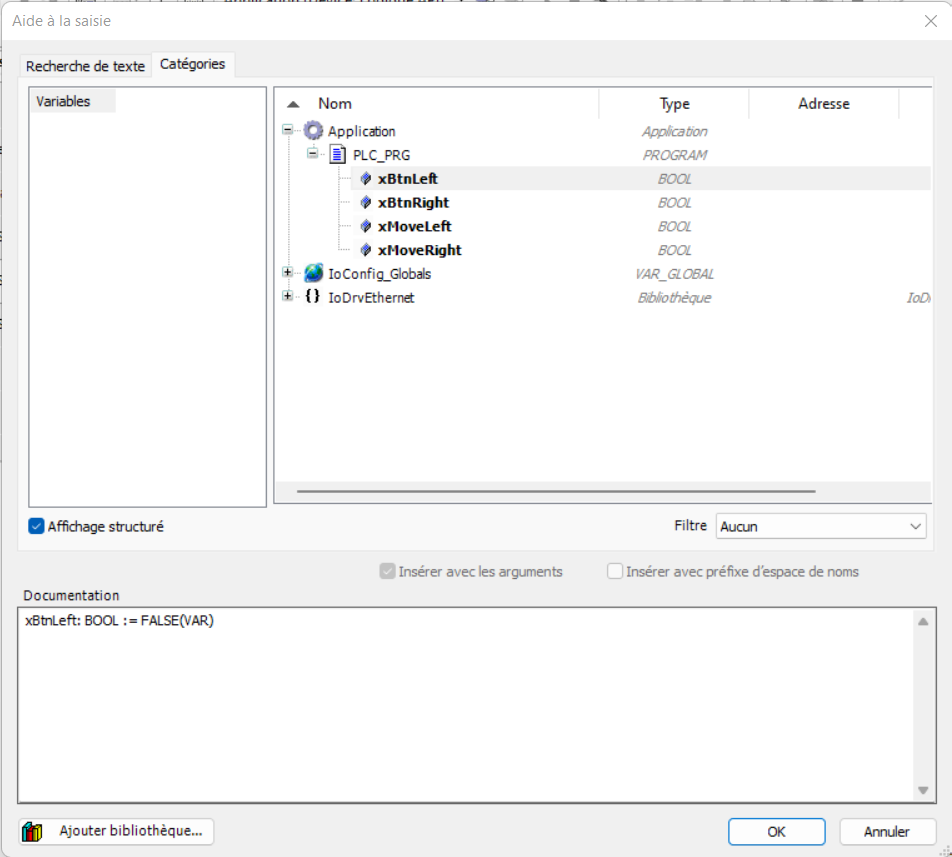
Repeate it for your four variables. At the end, your mapping tab should look like bellow.

Test the setup and program
First verify that the modbus_ws_adapter is running and that no error are reported on the simple axis model page.
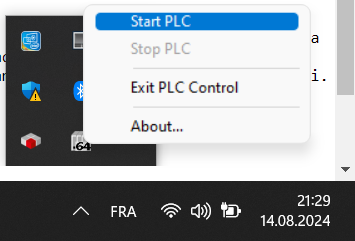
In your system tray, start the emulated PLC. Right click the icon and click "Start PLC". Note that if a problem occurs with the modbus server, the PLC must be restarted and will not automatically restore the modbus comunication when the server is back on the network...
In CODESYS, click on the Connect icon (or press Alt+F8). The first time you connect to the PLC, you might register a user and password to secure the access to the plc.
Once connected, simply click the Run icon to run your program on the emulated PLC. Verify that the modbus slave Device has the green update icon next to it indicating that the connection and data transmission is successfull (note that you MUST have the socket proxy running already).
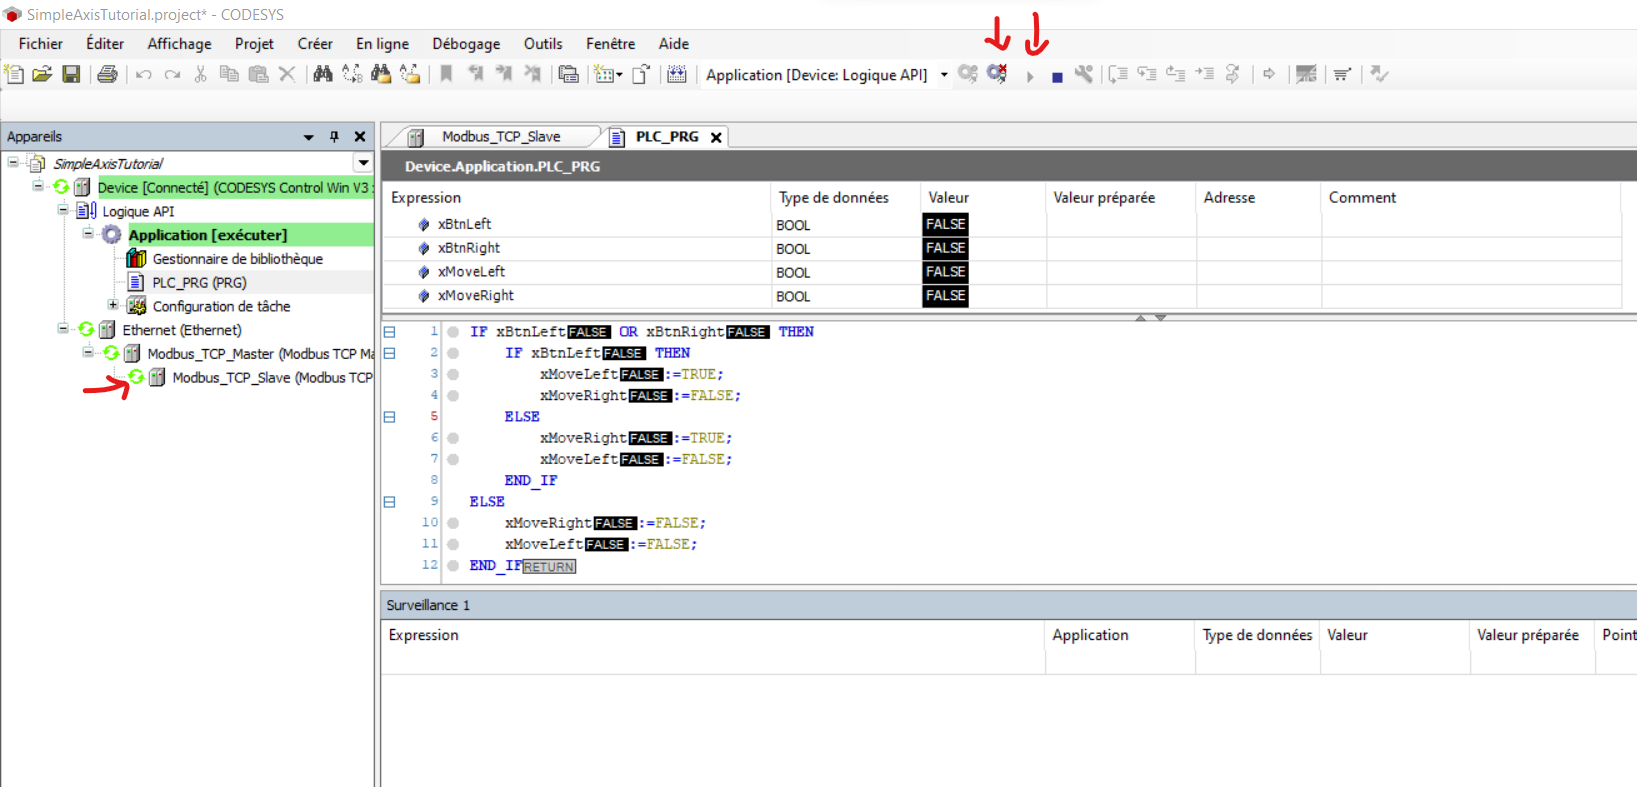
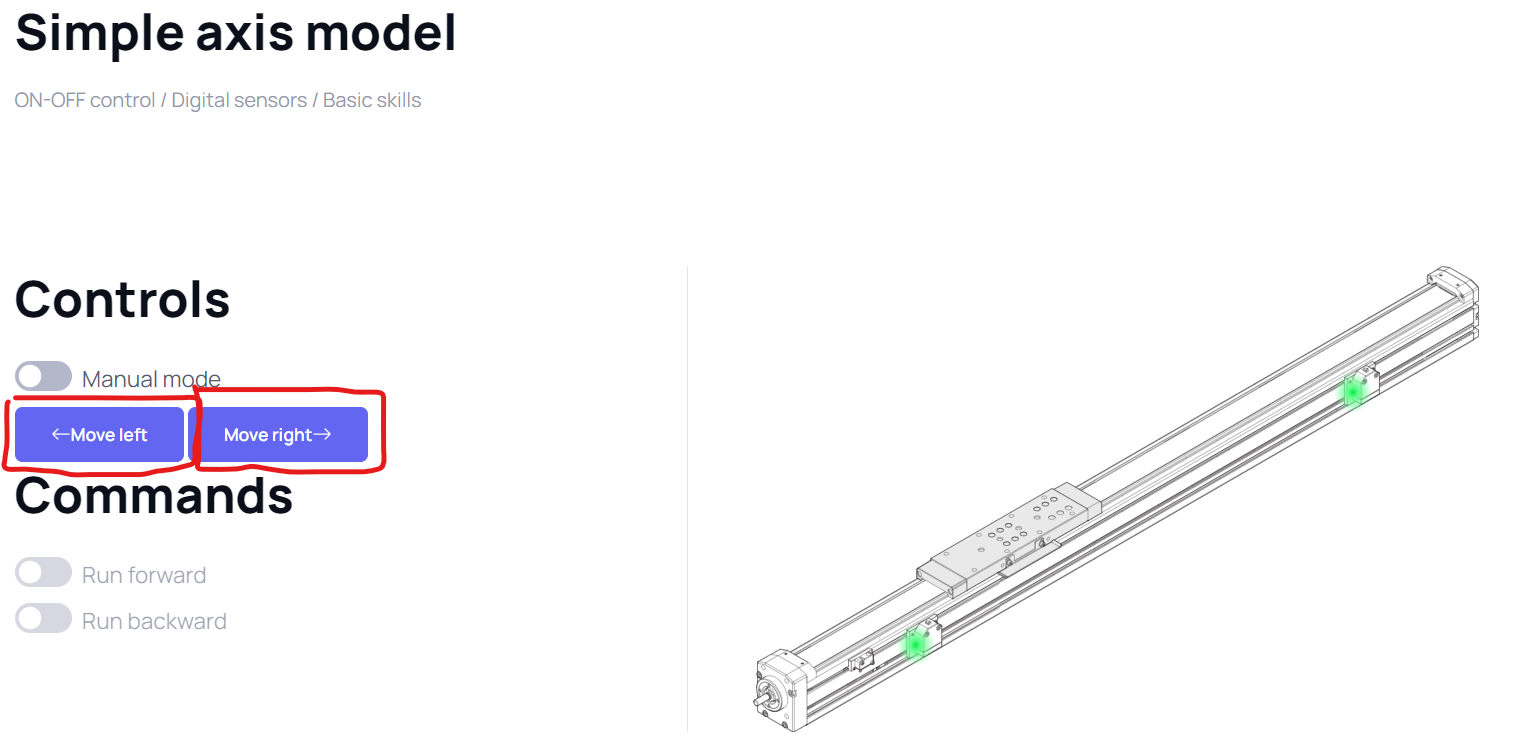
Now from the Simple Axis model page, you should be able to move the axis using the two buttons Left and Right.
Conclusion
In this tutorial, we have installed CODESYS V3, setup a project to connect to the simple axis model and finally write a simple program to test it. It is important to note that the comportment of the model is determined by the program running in your emulated PLC on your PC. Altering the program will change the comportment. Try to switch the directions or implement a "latch" comportment of the buttons.